Lavender wands are a beautiful, traditional craft that are easy to make and help bring the scent of fresh lavender into your home, as well as being a pretty way to use up scraps of ribbon. They also make lovely gifts or natural air fresheners. We’ve created this simple step-by-step guide to help you create your own lavender wand, perfect for Gower Lavender fans and crafters alike.
What is a Lavender Wand?
A lavender wand, also known as a ‘Fuseau de Lavande’ in France, is made by weaving ribbon around fresh lavender stems to create a fragrant, decorative bundle. Traditionally used to scent linens and repel moths, these wands are both practical and charming.
What You’ll Need
- Freshly picked lavender stems (ideally somewhere between 11 and 15, always use an odd number for the weaving pattern)
- 1.5–2 yards (about 1.5–2 metres) of 6mm or 1/4″ satin ribbon (either use up scrap/ waste ribbons or choose a biodegradable ribbon – we like the ones made from wood pulp)
- Small elastic band or thread
- Scissors
- Toothpick (optional, for tidying buds)
- Lightweight pruners (for harvesting and trimming stems)
Harvesting and Preparing Your Lavender
- Harvest lavender in the morning after the dew has dried, choosing long, straight stems (at least 30cm or 12 inches) with flowers just starting to open for the best fragrance and flexibility.
- Strip all leaves and any side buds from the stems, leaving only the main flower heads.
- Trim stems to a uniform length to make weaving easier.
Step-by-Step Instructions
1. Bundle and Tie
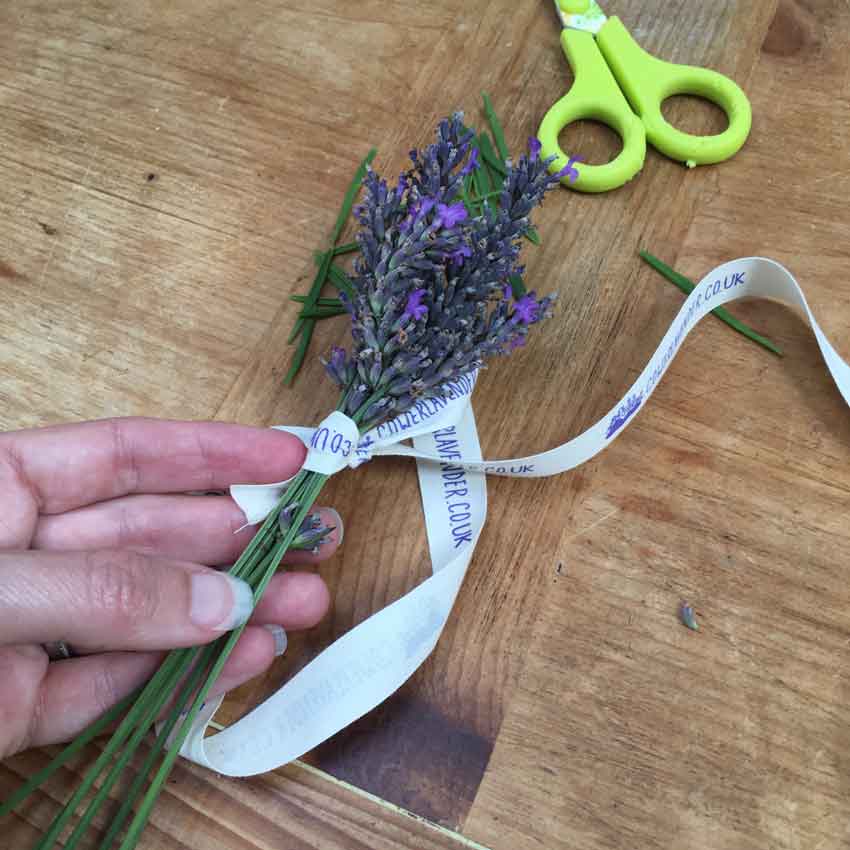
- Gather your lavender stems into a neat bundle, aligning the base of the flower heads.
- Secure the bundle just below the flower heads with a small elastic band or thread.
- Tie one end of your ribbon over the band, leaving a short tail (about 30cm) hanging down.
2. Create the Cage
- Hold the bundle upside down so the flower heads point down.
- Gently bend each stem down over the flower heads to form a cage. Score the stems lightly with your fingernail or the blunt side of your pruners to avoid snapping. This is why fresh stems are best, as they are more flexible and less prone to snapping!
- Space the stems evenly around the flowers for a neat appearance.
3. Start Weaving
- Pull the long end of the ribbon out, leaving the short tail tucked inside the cage.
- Begin weaving the ribbon over and under each stem, working your way around the bundle. The first row is the trickiest—be patient!
- On the second row, weave under the stems you went over in the first row, creating an alternating pattern.
- Continue weaving until all the flowers are covered. Use a toothpick to tuck in any stray buds and keep the weave tight.
4. Finish the Wand
- Once the flower heads are fully enclosed, wrap the remaining ribbon around the neck of the wand several times and tie it off securely.
- Trim the stems at the base so they are even for a tidy finish.
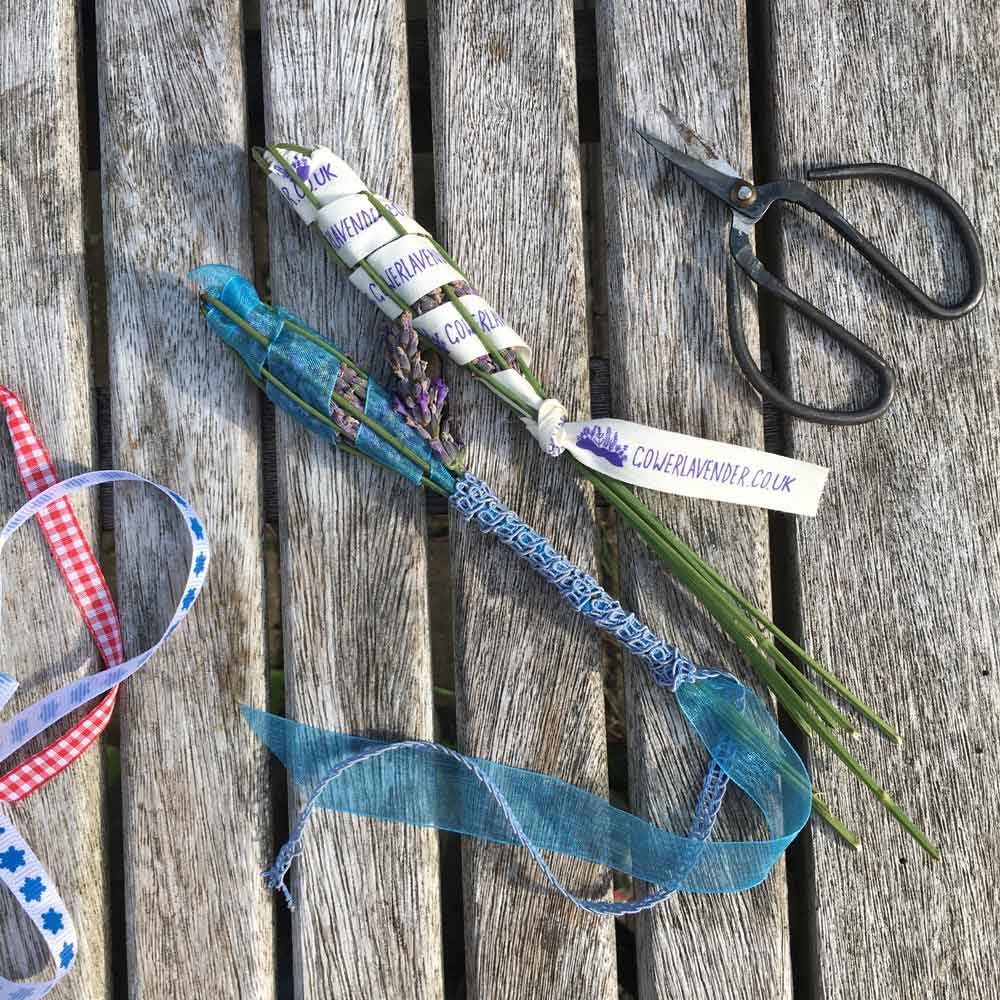
5. Let It Dry
- Tie a temporary bow with any leftover ribbon and allow the wand to dry for 2–3 days. The stems will harden and hold their shape.
- If the ribbon becomes loose as the wand dries, gently tighten each loop and re-tie at the neck.
Tips for Success
- Always use fresh lavender—the stems need to be flexible for bending and weaving.
- Use an odd number of stems for the best weaving pattern.
- If the fragrance fades over time, gently squeeze or roll the wand between your palms to release more scent.
- Add a drop of lavender essential oil to refresh older wands.
- Avoid putting the fresh stems near linens until they are properly dried out to avoid staining fabrics.
Why Make Lavender Wands?
Lavender wands are a such a lovely way to preserve the scent of your lavender harvest. They make great gifts, natural air fresheners, and are the perfect addition to any drawer or wardrobe.
Happy weaving from Gower Lavender!